skip to main |
skip to sidebar
Yesterday, while taking something down to the basement, I began inspecting the very sad state of our basement stairwell. I thought it odd that the stairwell's ceiling sloped, until it dawned on me... our neighbor's house has a rear / 2nd stairway to the second floor... we probably do too, except ours has been covered up by a wall on the first floor and floor on the second!
 I quickly sketched up a revised second floor plan, illustrating modifications to our current plan if we were to go ahead and resurrect the hidden stair. The bottom plan shows existing, while the top plan includes the 2nd stair.
 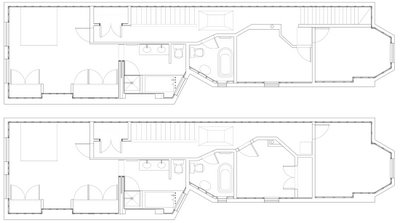 We decided to just leave the hidden stair hidden. Too much space is lost on the second floor to justify the cost of restoring the stair... even though it really is a fantastic vintage original feature (sigh).
Exactly one year ago, we began major interior construction efforts on the house with the total gut rehab of the existing second floor bathroom, which, in truth, did not really exist, apart from a very sad little tub and cracked lead pipes peeking thru a crumbling tile floor. We decided to work with what we could salvage, which turned out to be wall studs and a window...
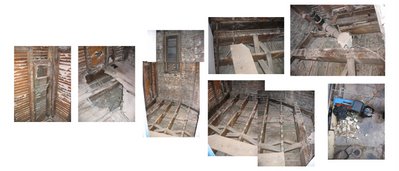 All the floor joists needed to be reinforced, due to water damage. One needed to be partially replaced, due to extensive water damage... and of course, the stairs framed into THIS particular joist. Alas, began the Great Joist Project of 2006.
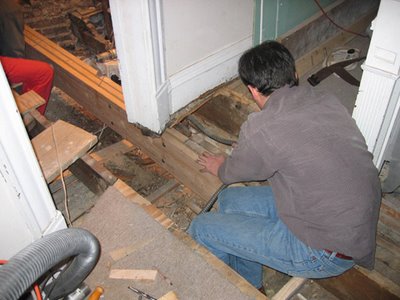
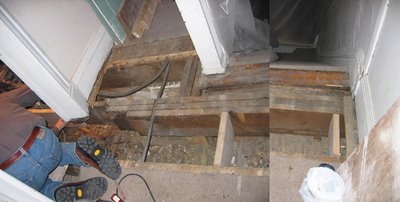 Temporary column supports were constructed on the first floor and in the basement, so that the second floor would not fall onto our first floor. The best part was removing these... Just in case the connection between the new joist and the old failed, we decided to remove the temporary column supports in increments, so that the columns could still serve as an emergency crutch. I sat in the upstairs corridor, watching the joist connection, while Bryan cut away at the bottom on the column on the first floor, inch by inch... if I saw any indication of failure, I was to yell, and how. Good news is the connection did not fail... there was settlement though, which was pretty darn interesting to see...
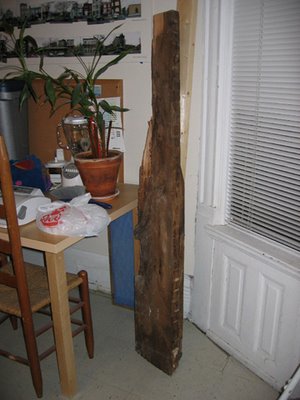
  The infamous rotted joist... I don't think it was supporting ANYTHING, which means with our new joist, I think structurally, we should be a-okay.
 Due to the very odd shape of the room, we decided to go with octagonal 1" marble floor tile. We found a great deal at Tile Outlet (on Fullerton Ave., just west of the Kennedy Expressway). Only $6. per square foot! The only problem was that the tile came in 12" square foot sheets and the mesh backing of these sheets caused a sticky gluey nightmare when cutting the tile. In addition, the stone is not the best quality... but it's as close to Carrera or Thassos Marble as I think we'll be able to get! Ceramic wall tile came from Daltile... with industry discout we paid approx. $1.25 per square foot. THAT was a GREAT deal!
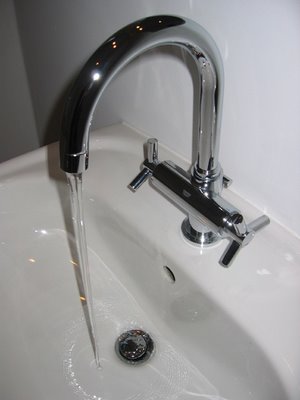
 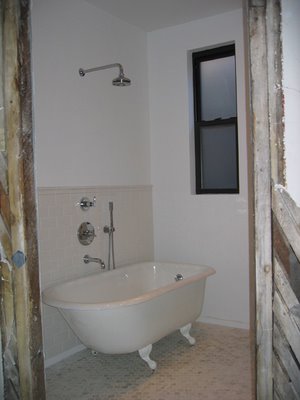 When we started this project, we weren't sure if we would be adding a second bathroom upstairs, so we decided to install a nice big soaking bathtub, with shower. The double ended clawfoot tub was our first choice, but in cutting costs, we went with a slightly smaller single ended clawfoot tub instead, purchased thru Signature Hardware. Bathtub, shower and sink faucets came thru Grohe (a bit of a splurge, but they are BEAUTIFUL... they feel so solid yet operate so smoothly... like silk). The pedestal sink came from Vitra Bathrooms and amazingly, was the cheapest purchase of the project, at approx. $130.
 The toilet is a Kohler Cimarron, low-flow, therefore eco-friendly, purchased thru Home Depot. The medicine cabinet came thru Basco, Inc (not the best quality, but about 1/2 the price of Robern). Light fixtures are Halo, 4" recessed can lights, courtesy of the Home Depot and the radiant floor heating was purchased thru Warmly Yours.
  There are some items we still have yet to install... a shower curtain rod, some storage and shelving, towel hooks or rails, toilet paper holder (crucial, I know...). We also were debating on adding some extra tile on the walls... and, finally, when we paint the rest of the upstairs, this room will be included. Oh... almost forgot, some blinds, for the window... right now it sticks out like a stubbed toe. Oh well... new window was not in the budget.
Last October, we decided to submit an application for a City Of Chicago Green Roof Grant. The program, established in 2005, awards selected residential and small commercial projects (less than 10,000 square feet) up to $5,000. each, to assist with the construction of a green roof. Excerpts from our application: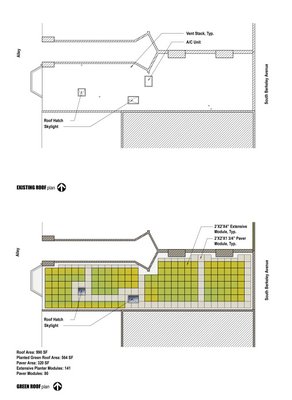
 Application was submitted and forgotten... until a letter arrived in mid-December, notifying us that we were selected as one of the recipients. We should be receiving the official 'Green Roof Grant' package sometime later this month. Stay tuned...
 I quickly sketched up a revised second floor plan, illustrating modifications to our current plan if we were to go ahead and resurrect the hidden stair. The bottom plan shows existing, while the top plan includes the 2nd stair.
  We decided to just leave the hidden stair hidden. Too much space is lost on the second floor to justify the cost of restoring the stair... even though it really is a fantastic vintage original feature (sigh).


