October 17, 2006

Termites, Wasps and Barry White

I am not a Monday person. Typically, I don't sleep well Sunday night. Anxious of what lies ahead in the upcoming week and bummed that the weekend has come to an end, insomnia hits. I read or watch old NBC sitcoms on WGN, hoping I doze off at some point. This past Sunday was no different, except I sat in bed making lists of outstanding work I had to go over with the contractor, updating the construction budget and preparing a set of drawings for the electrician, who was starting bright and early Monday morning.

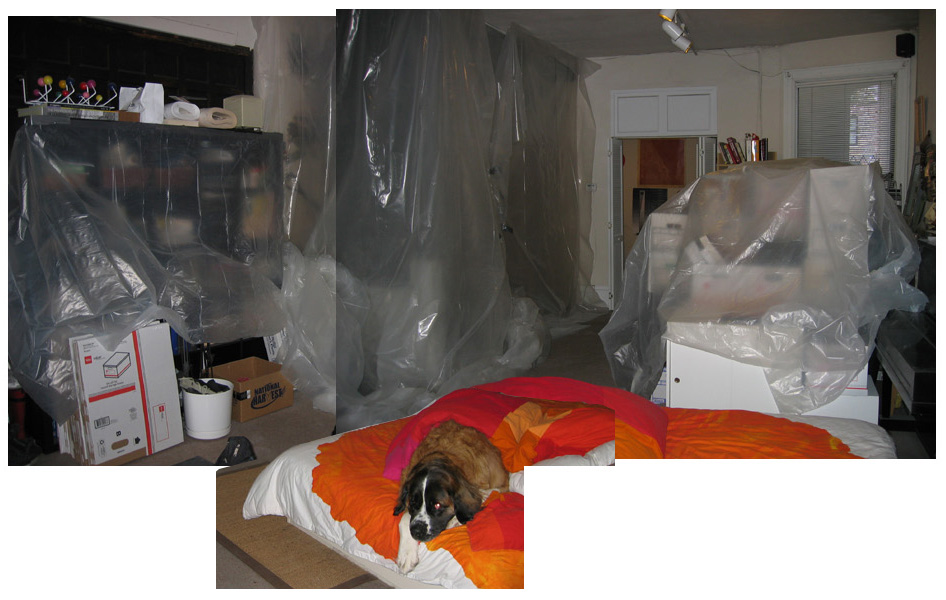
7:30 am Monday - the electrician arrived with his crew of 2. Right away, they unloaded the truck and got to work, a Barry White CD blasting in the stereo.

I LOVE MY ELECTRICIAN... and not because he likes Barry White. Professional, fast, accurate and efficient... not to mention, affordable, Belcher Brothers Electric gets my stamp of approval and recommendation. They will be done with the ENTIRE upstairs, by tomorrow. These guys seriously don't mess around...

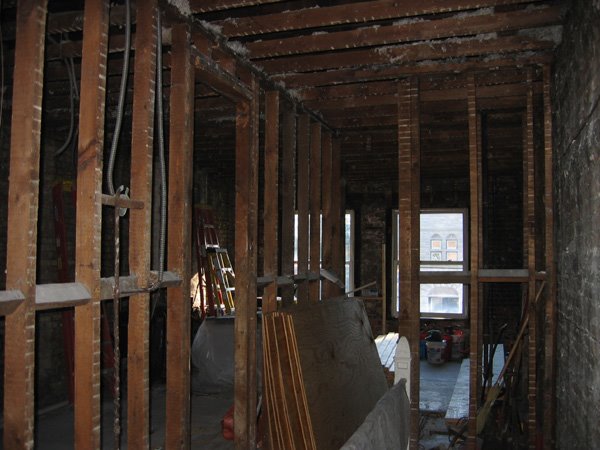
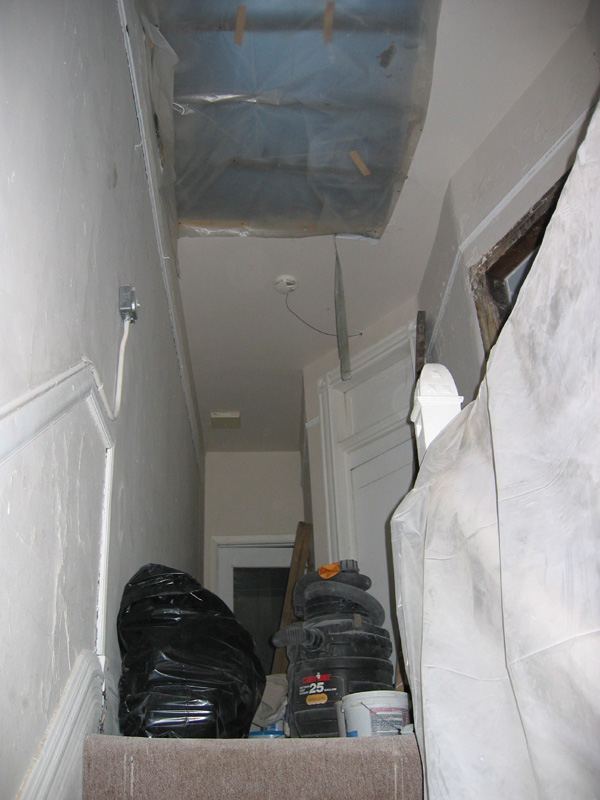
As for the back bay... that's a circus act. I stuck around the house until the previous patch job was dismantled and the floor was taken up all the way back to where the cantilevered joists tie into the floor joists. Bryan came home during lunch to check in.

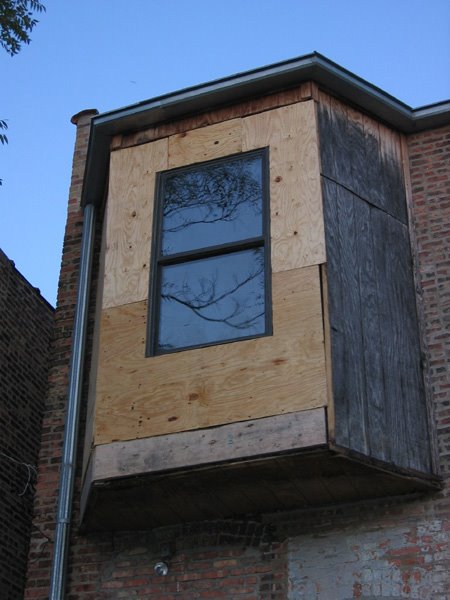
With the walls removed, I started thinking, maybe let's just chop off that whole cantilever, square off the back and call it a day. But, the roof projects out over the bay, so we'd have to chop that off too, and it started getting complicated again, so I nixed that thought. Still, it's kind of nice, open... even though the primary view is of our neighbors' garages.
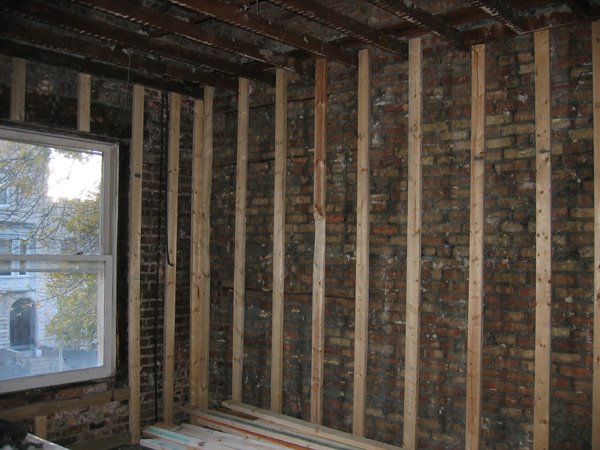
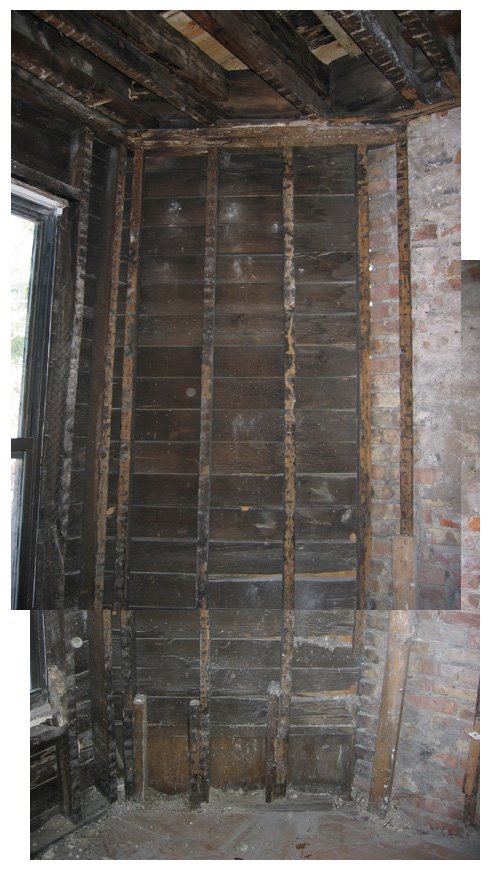
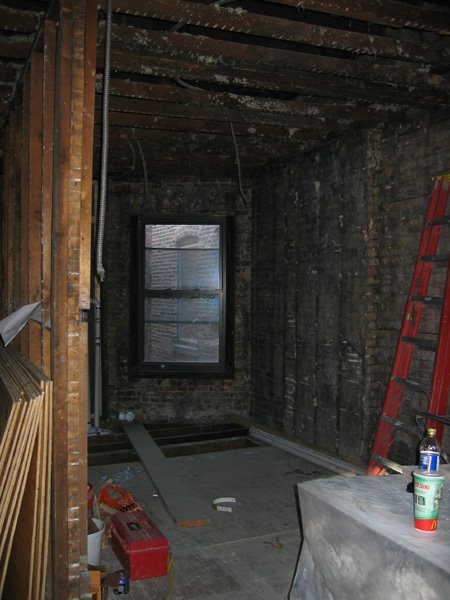
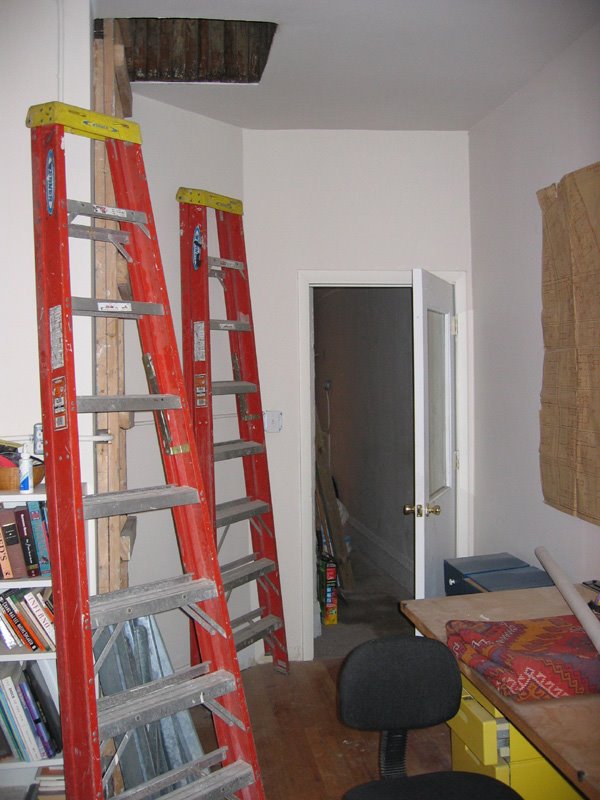
We discovered the 2 joists closest to the masonry wall in the photo below had to be completely replaced, along with the stringers.
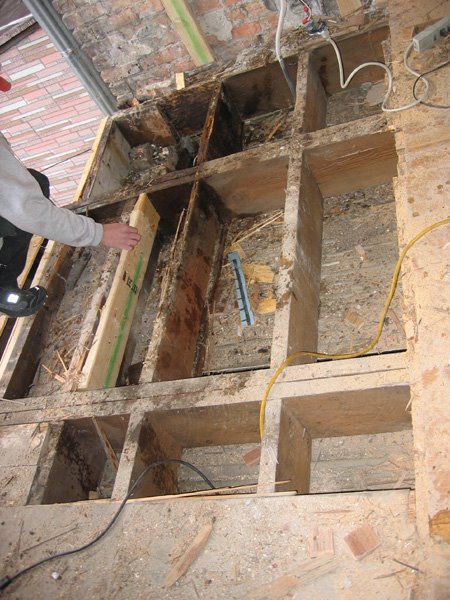
Dry rot and termite damage. When I heard the word 'termite' I freaked... immediately I started inspecting every square inch of wood in the upstairs... floor joists, the subfloor, wall studs, ceiling joists... anything and everything. It looks as though the damage was focused in that corner though, and it looks old. Still, once at the office, I immediately called Terminix for an estimate. Bryan said to drop it... but I can't... it's TERMITE damage. I just picture our house, slowly turning to wood dust. ... and by the way, I thought termite damage was more of a milder climate or rural issue. I mean, we live in the hood, surrounded by concrete. 
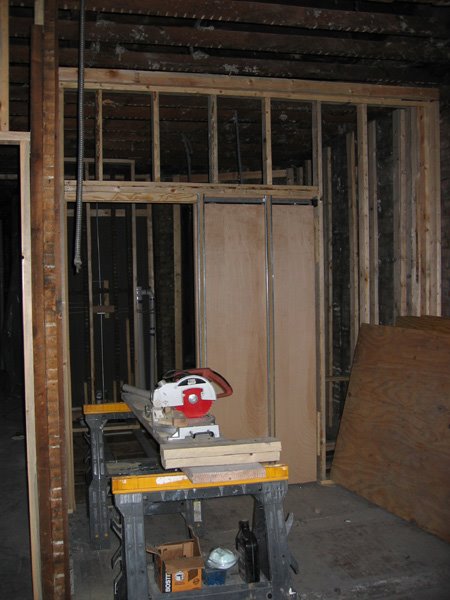
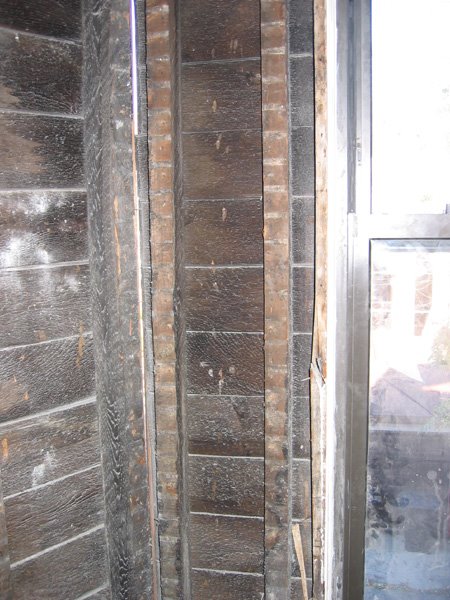
The photo below is a close-up of a joist with some termite tunnel damage. 
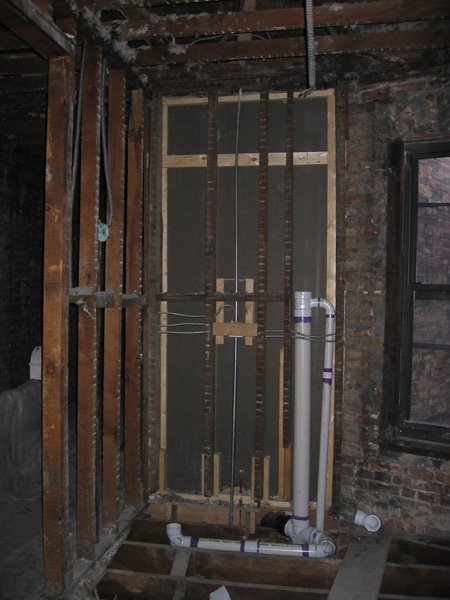
In addition, we discovered the masonry load bearing back wall, on which the cantilevered joists rest, needs to be tuckpointed, BIG TIME. This is partially due to a football size wasp nest that had been attached to the wall, for years. 
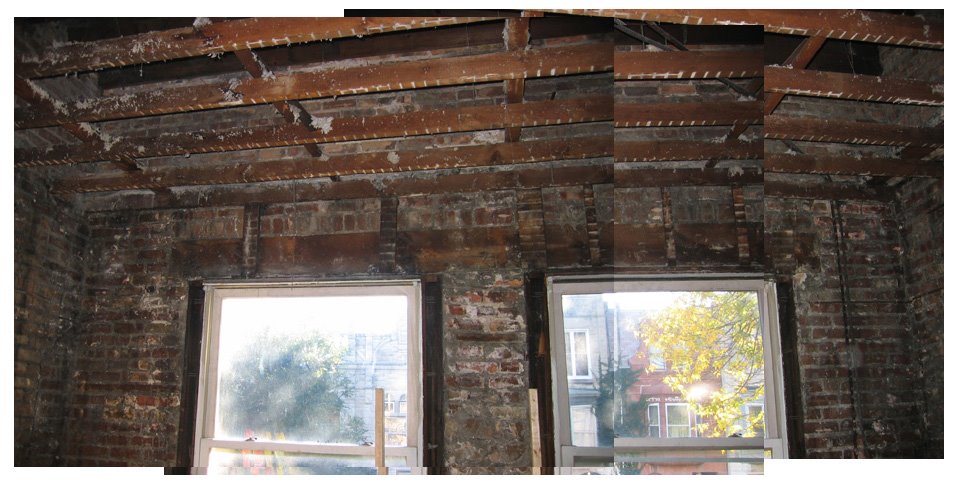
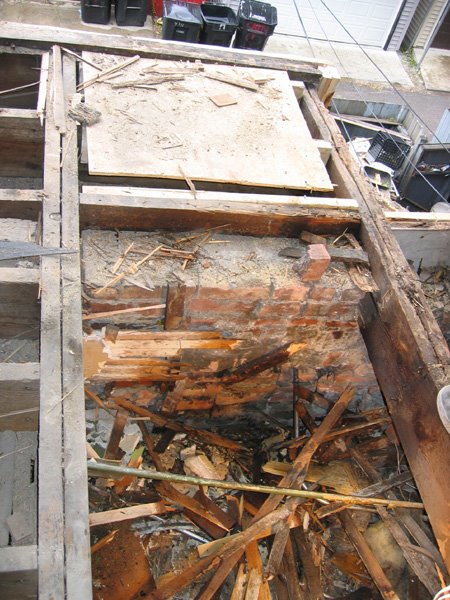
We used about 7 cans of Raid Wasp and Hornet Killer to extinguish the population. No joke. You can see bits and pieces of wasps and honeycomb in the photo above. Honestly, I feel a little bad for the wasps, everyone needs a home. But hey, wasps aren't the friendliest of neighbors to have around...

October 16, 2006

King Stud

My friend Larry emailed over today, this handy little diagram, to forward to the framers, since it appears they may have forgotten how to frame a window properly (see yesterday's post)... that, or they must be smoking crack.

October 15, 2006

Let's try this one more time...

It has been one long weekend. Friday morning, the guys started working on the cantilevered bay projection. When we spoke with the contractor, it was our understanding that the ENTIRE bay would be rebuilt. We came home to find the patchwork in the photo above.

I appreciate that they managed to salvage areas that were not rotted out, but come on... I think they could have produced better carpentry with the areas that were replaced. None of the plywood edges join properly. In addition, as you can see in the photo below, they completely framed the window incorrectly... what happened to the continuity of the 2x4s directly next to the window? They SHOULD frame directly into the floor...

I'm not quite sure how the 2 walls connect... there's no strapping nor any lapping of the 2x6s at the ceiling... I think that shim of a 2x4 may the link... scary.
WAY too large of a gap b/w the window and the framing... and I still cannot believe they cut that vertical 2x4.
We met with the contractor this afternoon and said that the work has to be completely redone... he agreed. Basically, he said he wasn't around to supervise the work and it was done in a rush and is totally unacceptable. So, they are starting from scratch tomorrow morning. I hope I hope I hope they get it right this time. I'm sticking around in the morning to supervise.

Oh... and to top it all off, we discovered some wasps made a nest in our wall - in the cavity between the brick and the plaster/lath interior wall. Brilliant. That explains why we've been discovering a handful of wasps in that back room, on the first floor... including a wasp that buzzed itself into my shoe and stung me. Mean bugger.

October 13, 2006

Framing Update

View down corridor, towards front (master) bedroom, facing street. Stair and new hall closet to the right of the corridor, new master bathroom and existing bathroom to the left of the corridor.

Front (Master) Bedroom, facing street - Furring along exterior and party walls.

Front (Master) Bedroom - Pocket door into new bathroom.

Skylight opening in corridor. In-progress, additional framing still necessary, along with additional framing in order to level the entire corridor ceiling... You can kind of see it in the photo above - there is about 1 1/2" difference in height, using the bottom of the ceiling joist as a measuring point, between the masonry wall and the interior corridor partition wall. It becomes startingly obvious with the skylight opening.
Hall closet and entry into master bedroom (the entry to the bedroom hasn't really changed, we just wanted to try and make the doorway slightly wider, since originally it was only 2'-4").

Now we just need the electrician...

Picked up the recessed can lights at Home Depot last Saturday... they have been sitting in our living room since, awaiting the electrician's arrival Monday. We are using a combination of 4" and 5" Halo recessed can lights, with white baffle trim, throughout the entire upstairs. Originally we were going to get Juno light fixtures thru Lightology. However, after taking a second look at our budget and running a cost and performance comparison with Halo, we opted for Halo, with a cost savings of over $1500. We didn't get the trim option we wanted and Juno fixtures do perform better, but sacrifices must be made and $1500. is mucho dineros.

Our electrician has been really cooperative by allowing us to buy our own light fixtures and switches (combination of Lutron and Leviton). Not only do we get the exact types we specified, we save a large chunk of money in purchasing everything ourselves.

Exhausted.

We have been taking Charlevoix to "doggie daycare" every day, while construction workers invade our home. It's just way too dusty and noisy - Charlevoix starts sneezing and wheezing and hides out under the desk or in some corner, bewildered as to what exactly is going on. Not to mention, people are constantly going in and out, leaving the front door open... and most of the guys are scared of her, even though she really is just an oversized lap dog.

Anyway, months back, in searching for a place to board the pooch while we were in Europe, Bryan found this overnight/daytime dog boarding kennel in the South Loop - DoGone Fun. It is fantabulous! It seriously is like a montessori of dog kennels. Fenced in playing areas indoors and out, equipped with toys and kiddie pools, Charlevoix LOVES it. Somedays she's with the big dogs, other days she keeps company with the small ones. If she feels like going inside for a nap, no problem. If we have to work late, not a problem either, since someone lives above the kennel.

The only thing is, Charlevoix, by nature, is a bit of a slug. She is used to napping all day long. So, now, after a full day of exercise and excitement, she is exhausted to the core. Once she goes down, she is down 'till morning. She even sometimes moans in her sleep. This photo was taken Wendesday night - she lay down on the bed, atop a pile of blankets and pillows, placed her head on the back of the couch and was snoring away within minutes. She slept like that for 2 hours straight. Seriously.

October 12, 2006

Flashback... Fall 2004

Photo taken during the Skylight Installation Project.
The white specks floating around are not snow, but rather insulation particles set free, once the ceiling was punched open. Note the lovely respirator draped on my face... I swear that thing weighed about 15 lbs.

Current First Floor Plan


Cozy...

October 10, 2006

Rehabbing Rule #1. Every surprise uncovered = $5K min.

The sad little cantilevered bay projection in the photo above was our first "surprise", although honestly, we anticipated it had issues, as mentioned in an earlier post. Turns out, it has ISSUES. The entire bay is completely, utterly, totally, molecularly rotted.
We are talking about so rotted that one can turn wood to dust with a swipe of the index finger.
That crack of blue at the top center of the photo... that is DAYLIGHT shining thru. My pinky can fit into that crack, no problem.
A window sill that has seen brighter days.

I am SHOCKED we haven't had that bay drop itself into the alley and just evaporate into thin air, dust in the wind. Anyway, it looks as though this Thursday work on the bay begins. Since the roof cantilevers out over this projection, it will have to be temporarily rigged while the floor joists are repaired and lifted with hydraulic jacks. In addition, all 3 walls will be completely rebuilt...
* Note to self: Go to Dominick's Wednesday night and pick up 5 bottles of TUMS and 5 bottles of hard liquor. Use as needed starting Thursday.

The 115 Year-Old Lintel

Seriously.

October 8, 2006

Demolition Photos

View from the corridor, towards the front bedroom (facing street).
The stairwell.
The stairs. These are going to need some work...
Future master bathroom and part of master bedroom. The floor has been removed in order to rough-in new plumbing.

New Master Bath

... it's a start, and of course, one must start with the toilet plumbing.

October 6, 2006

Existing Second Floor Photos

Corridor at top of stairs. The beast of a Shop-Vac was one of the items left by the previous owner. The spot of light shining thru the plastic comes courtesy of our Velux Skylight. We staple-gunned the plastic up to keep the blown-in insulation from blowing around the house, since we opened up a big ole' hole in our ceiling, and did not want to patch it up since we were going to be demo-ing and rebuilding the entire upstairs eventually anyway (which is the project for this fall and winter). Upstairs Corridor, 2003 (pre-skylight). Notice the lovely surface mounted conduit and random doors installed...
Front Bedroom (facing street), 2003. What you don't see is the chipped, cracked and pitted plaster ceiling above... it was in this bedroom that we discovered we needed a new roof.
Back bedroom (facing alley), 2003. Notice the 2" x 4" lumber nailed to the wall? Well, the previous owner installed a 'permanent' ladder, for easy access to the roof hatch (shown in photo below). I'm serious, no joke. 2" x 4" lumber. Nailed. Directly. To the wall. Random. It looks like it took someone all of 5 minutes to construct. Another feature in this room is that the floor slopes significantly to the right, near the window. We NOW discovered (post-demo) that the whole cantilevered bay in this bedroom needs to be rebuilt. More on this later...
Another photo of the back bedroom. Notice the door to the bedroom... it looks like some door in a car dealership office. I bet it was... The 2 ladders and desk chair also came with the house, along with the 2" x 4" LUMBER NAILED DIRECTLY TO THE WALL - it's not like they were short on ladders... besides, there are 2 more ladders in the basement. Idiots.

Existing Second Floor Plan

When we purchased the house, the second floor only had 4 bedrooms, 1 closet, a room that appeared to have been a bathroom at one time, and a very long corridor. We gave back the bathroom its identity and we installed an operable skylight. Originally, there were supposed to be 3 skylights over the stairs, but I'll save THAT story for another day...

The Modern Smoke Detector

While sufing the web last night, researching pocket doors, door hardware, shower pans and everything else architectural, I stumbled upon Architectural Devices. They have developed a beautiful little smoke detector that sits flush with the wall, or ceiling, finish. The only pitfalls of the device are: it has not yet been mass produced; at $130., it's a bit too pricey; and it is not a combination smoke/carbon monoxide detector. Oh well. A brilliant idea nevertheless.

We'll probably end up with a cheap-o unit from Home Depot that will beep away, with every slightest puff of shower steam escaping the bathroom.

October 5, 2006

Let every surface be covered in plastic but one...

Photo taken minutes prior to Charlevoix being attacked by a rogue sheet of 6mm Plastic Tarp... Charlevoix emerged from battle unscathed and steadfast on the bed. The 6mm Plastic Tarp was not so lucky...

Construction Timeline Recap Equation

March 2003
House is purchased and we move in.
+
Fall 2003
De-junking Phase I
The house was an "as-is" purchase... "as-in", we inherited a gold mine of STUFF. "One man's junk is another man's treasure..." Um, well, I wouldn't call our inheritance a treasure, but I have to admit, some of it has been of some value. The previous owner, a contractor, used the house as his field office. As a result, the house contained a slew of random office furniture and the basement held a smorgasbord of construction equipment and building materials. We donated all the office furniture (minus 2 drafting tables, a flat file and some filing cabinets) to a Salvation Army type of organization (De-junking Phase I). As for the construction equipment and building materials, 1/2 was donated, the other 1/2 we kept (items such as a generator, lawn mower, 2 sinks, a toilet, a couple of recessed downlight cans, shovels, ladders, a sad but operable shop-vac and few other goodies).
+
Fall 2004
Installation of Skylight (framed that out ourselves, no sweat)
New Roof (came home one day to find the bedroom ceiling dripping, lots of sweat)
Target area Tuckpointing (budget constraints, so we just focused on the critical areas)
Rebuilding of Masonry Parapet Walls and Repair of Stone Parapet
De-junking Phase II (Basement - Construction Equipment and Building Materials)
+
Summer 2004 - Winter 2005
The Saga of the Sewer
In summer of 2004, we discovered with every heavy rainfall, sewer water would back up into our basement and form this small puddle around the drain. As time went on, we noticed the puddle grew in circumference. THEN we noticed, it no longer took a heavy rainfall to get the puddle. THEN we got a BIG puddle after doing a load of laundry... I'd say that was the final straw. One can only mop-up so many puddles with Clorox, plus the 1/2" thick concrete topping slab was starting to wear thin in the 'puddle zone' and I feared we would end up with a dirt floor soon. After 4 plumber visits, 3 city inspections and 2 big digs, no more stinky puddles. We still have to install a catch valve, but for now, all is quiet in the subterranean realm.
+
9pm - 2am December 23, 2004
New Furnace (Merry Christmas!)
+
Fall 2005
New Flue Liner Installed
Basement Electrical Panel upgraded to 200 Amp.
+
Winter 2006
Gut-rehab of Existing 2nd Floor Bathroom
+
Fall - Winter 2006 / 2007
Finish up the work on Existing 2nd Floor Bathroom
TOTAL Gut-Rehab of 2nd Floor
=
The Money Pit!

October 4, 2006

Rowhouse in Rehab

Back in August 2002, Bryan and I decided to go for it and purchase a "fixer-upper" - Bryan is a structural engineer with a background in architecture and I am an architect that grew up with a architect father who was always "fixing-up" old houses. What else would we do?

We spent 7 months searching for "the perfect house" - historically intact, yet neglected enough so that we could actually work with it... lots of character, but not rat infested... enough ghetto so that we could get a lot of house for our dollar, yet safe enough so that we didn't need to ask Mr. T. to be our roommate... Anyway, Mr. T. would not have been necessary since we have our Charlevoix, 125 lbs. of St. Bernard whoop-ass...

We decided to focus our search in the neighborhood of North Kenwood, Chicago. A Chicago Landmark district, majority features rowhouses dating back to around 1890, a year after the area was annexed into Chicago. In March 2003, we became the owners of 4408...

Around 115 years old and a little over 2,000 sq. ft. (excluding the very unfinished and extremely nasty basement), this is home - even during all the construction (of which I will try and keep you all updated).

Technically, construction started in the fall of 2003, and has slowly been progressing, as our budget allows. I'll try and do a quick recap in my next post. However, after much planning and saving, the BIG work has commenced. Stay tuned...