January 15, 2007

FOUND: Service Stair

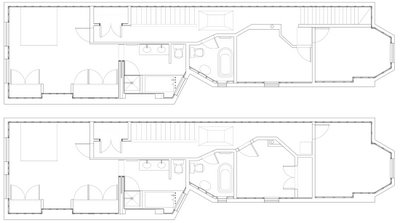
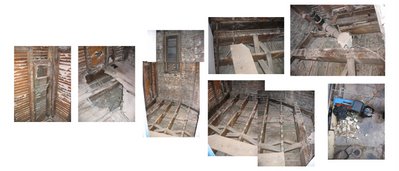
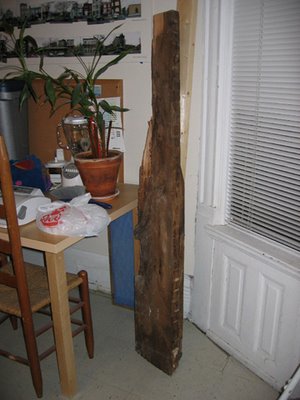
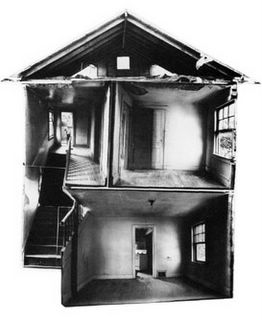
Yesterday, while taking something down to the basement, I began inspecting the very sad state of our basement stairwell. I thought it odd that the stairwell's ceiling sloped, until it dawned on me... our neighbor's house has a rear / 2nd stairway to the second floor... we probably do too, except ours has been covered up by a wall on the first floor and floor on the second!
I quickly sketched up a revised second floor plan, illustrating modifications to our current plan if we were to go ahead and resurrect the hidden stair. The bottom plan shows existing, while the top plan includes the 2nd stair. We decided to just leave the hidden stair hidden. Too much space is lost on the second floor to justify the cost of restoring the stair... even though it really is a fantastic vintage original feature (sigh).

January 12, 2007

Flashback... Winter 2006

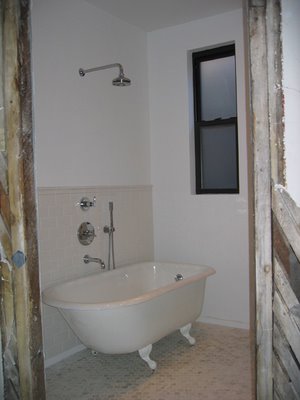
Exactly one year ago, we began major interior construction efforts on the house with the total gut rehab of the existing second floor bathroom, which, in truth, did not really exist, apart from a very sad little tub and cracked lead pipes peeking thru a crumbling tile floor. We decided to work with what we could salvage, which turned out to be wall studs and a window...
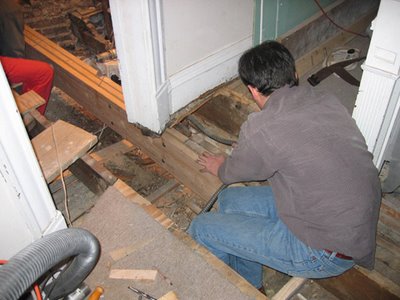
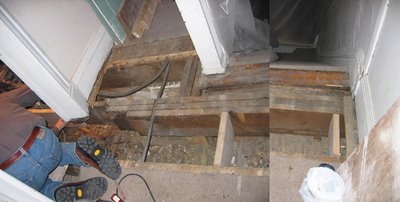
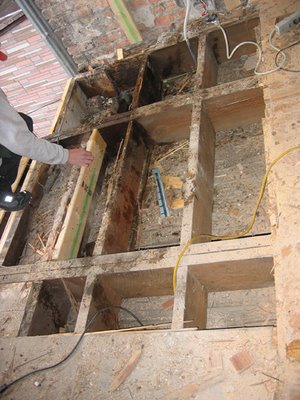
All the floor joists needed to be reinforced, due to water damage. One needed to be partially replaced, due to extensive water damage... and of course, the stairs framed into THIS particular joist. Alas, began the Great Joist Project of 2006.

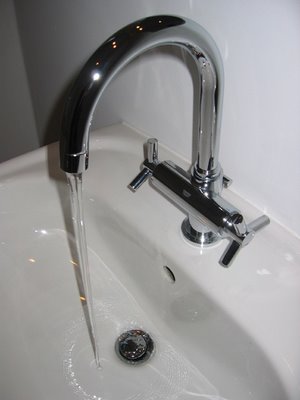
Temporary column supports were constructed on the first floor and in the basement, so that the second floor would not fall onto our first floor. The best part was removing these... Just in case the connection between the new joist and the old failed, we decided to remove the temporary column supports in increments, so that the columns could still serve as an emergency crutch. I sat in the upstairs corridor, watching the joist connection, while Bryan cut away at the bottom on the column on the first floor, inch by inch... if I saw any indication of failure, I was to yell, and how. Good news is the connection did not fail... there was settlement though, which was pretty darn interesting to see... The infamous rotted joist... I don't think it was supporting ANYTHING, which means with our new joist, I think structurally, we should be a-okay.Due to the very odd shape of the room, we decided to go with octagonal 1" marble floor tile. We found a great deal at Tile Outlet (on Fullerton Ave., just west of the Kennedy Expressway). Only $6. per square foot! The only problem was that the tile came in 12" square foot sheets and the mesh backing of these sheets caused a sticky gluey nightmare when cutting the tile. In addition, the stone is not the best quality... but it's as close to Carrera or Thassos Marble as I think we'll be able to get! Ceramic wall tile came from Daltile... with industry discout we paid approx. $1.25 per square foot. THAT was a GREAT deal! When we started this project, we weren't sure if we would be adding a second bathroom upstairs, so we decided to install a nice big soaking bathtub, with shower. The double ended clawfoot tub was our first choice, but in cutting costs, we went with a slightly smaller single ended clawfoot tub instead, purchased thru Signature Hardware. Bathtub, shower and sink faucets came thru Grohe (a bit of a splurge, but they are BEAUTIFUL... they feel so solid yet operate so smoothly... like silk). The pedestal sink came from Vitra Bathrooms and amazingly, was the cheapest purchase of the project, at approx. $130.
The toilet is a Kohler Cimarron, low-flow, therefore eco-friendly, purchased thru Home Depot. The medicine cabinet came thru Basco, Inc (not the best quality, but about 1/2 the price of Robern). Light fixtures are Halo, 4" recessed can lights, courtesy of the Home Depot and the radiant floor heating was purchased thru Warmly Yours. There are some items we still have yet to install... a shower curtain rod, some storage and shelving, towel hooks or rails, toilet paper holder (crucial, I know...). We also were debating on adding some extra tile on the walls... and, finally, when we paint the rest of the upstairs, this room will be included. Oh... almost forgot, some blinds, for the window... right now it sticks out like a stubbed toe. Oh well... new window was not in the budget.

January 11, 2007

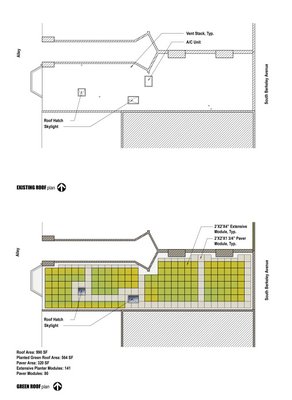
Green Roof Grant Granted

Last October, we decided to submit an application for a City Of Chicago Green Roof Grant. The program, established in 2005, awards selected residential and small commercial projects (less than 10,000 square feet) up to $5,000. each, to assist with the construction of a green roof. Excerpts from our application:
Application was submitted and forgotten... until a letter arrived in mid-December, notifying us that we were selected as one of the recipients. We should be receiving the official 'Green Roof Grant' package sometime later this month. Stay tuned...

December 1, 2006

Got Junk?

It seems expensive, cost ranging between $98 to $558, but 1-800-GOT-JUNK? may be a viable alternate for hauling junk and construction debris. They provide loading, cleanup and up to 60% of the items they collect are either donated or recycled.
Cost breakdown of self-hauling:
Permit for a dumpster = around $100.
Dumpster rental for 3 days = up to $300.
Chiropractor appointment after loading the dumpster = around $250.

... actually, 1-800-GOT-JUNK sounds pretty cheap.

November 22, 2006

Icehotel


Even though I am constantly cold (I even have a space heater under my desk at the office), Icehotel looks like an adventure. The hotel is located in Jukkasvjarvi, Sweden - a small village 200km inside the Arctic Circle. Several accommodation options are available: Cold, Warm or Wilderness Camp (I'm imagining dog-sleds, ice fishing and Reindeer rodeos). In the winter months, Icehotel offers snowmobile, dog-sled and moose safari day-trips, courses in ice sculpting, snowshoe and cross-country ski excursions, hunting, etc. In the summer, one can go hiking, fishing, hunting, canoeing and camping (plus more). The Northern Lights are visible all year round. I have officially put it on my list of places to visit.

Livingstones

Livingstones are ultra-comfy seating and sleeping cushions.
Available in wool and neoprene - for outdoor use.

Now everyone can be Princess Leia...

via Design Milk: The Princess Leia knit hat. Too funny. If I only knew how to knit...

November 21, 2006

Alexander Girard's Wooden Dolls

Wooden figures by Alexander Girard, originally made in the 1960's, have been recently re-issued by Vitra. Each doll has so much character!

November 17, 2006

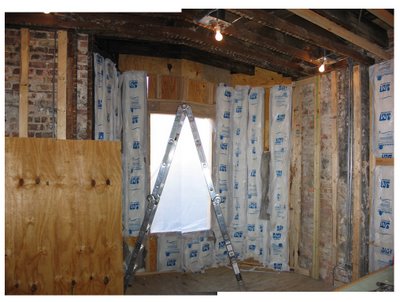
Insulation Installation

Front Bedroom

Back Bedroom

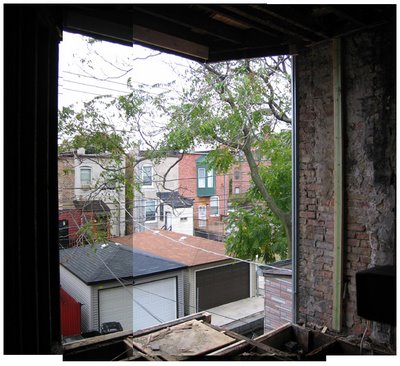
Back Bedroom Cantilevered Bay Construction In-Progress...


The guy in the photo above is Jonathan, our carpenter.
... and no, that 2x4 is NOT supporting the roof... not really...

Load Bearing Masonry Wall under the Back Bay

BEFORE

AFTER

There are corridor lights that actually WORK!

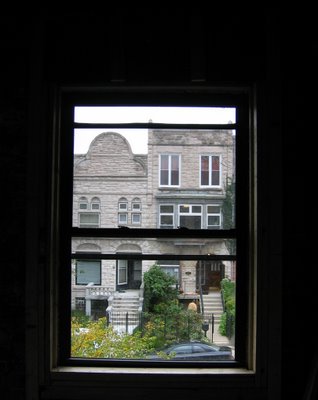
New Windows in the Front Bedroom


... one month later

Logging in this afternoon, I realized that my last post was one month ago, to the day.
It has been a bad month... very very bad.

I'm back though and I'll try to catch everyone up with the construction progress...

October 17, 2006

Termites, Wasps and Barry White

I am not a Monday person. Typically, I don't sleep well Sunday night. Anxious of what lies ahead in the upcoming week and bummed that the weekend has come to an end, insomnia hits. I read or watch old NBC sitcoms on WGN, hoping I doze off at some point. This past Sunday was no different, except I sat in bed making lists of outstanding work I had to go over with the contractor, updating the construction budget and preparing a set of drawings for the electrician, who was starting bright and early Monday morning.

7:30 am Monday - the electrician arrived with his crew of 2. Right away, they unloaded the truck and got to work, a Barry White CD blasting in the stereo.

I LOVE MY ELECTRICIAN... and not because he likes Barry White. Professional, fast, accurate and efficient... not to mention, affordable, Belcher Brothers Electric gets my stamp of approval and recommendation. They will be done with the ENTIRE upstairs, by tomorrow. These guys seriously don't mess around...

As for the back bay... that's a circus act. I stuck around the house until the previous patch job was dismantled and the floor was taken up all the way back to where the cantilevered joists tie into the floor joists. Bryan came home during lunch to check in.

With the walls removed, I started thinking, maybe let's just chop off that whole cantilever, square off the back and call it a day. But, the roof projects out over the bay, so we'd have to chop that off too, and it started getting complicated again, so I nixed that thought. Still, it's kind of nice, open... even though the primary view is of our neighbors' garages.
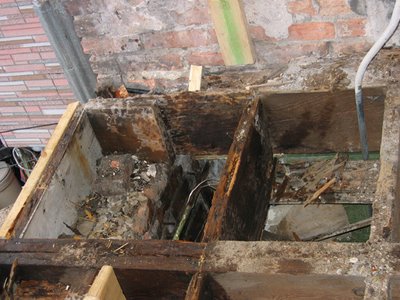
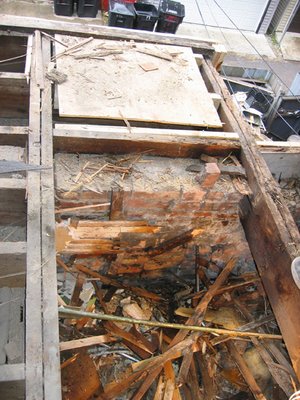
We discovered the 2 joists closest to the masonry wall in the photo below had to be completely replaced, along with the stringers.
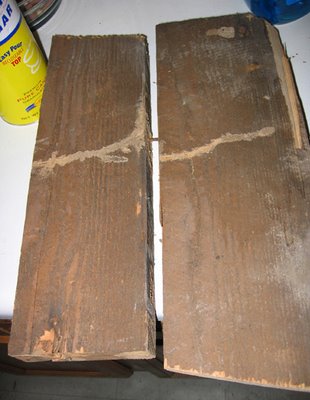
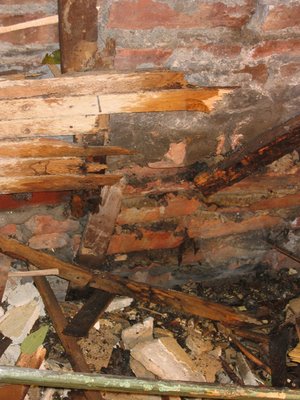
Dry rot and termite damage. When I heard the word 'termite' I freaked... immediately I started inspecting every square inch of wood in the upstairs... floor joists, the subfloor, wall studs, ceiling joists... anything and everything. It looks as though the damage was focused in that corner though, and it looks old. Still, once at the office, I immediately called Terminix for an estimate. Bryan said to drop it... but I can't... it's TERMITE damage. I just picture our house, slowly turning to wood dust. ... and by the way, I thought termite damage was more of a milder climate or rural issue. I mean, we live in the hood, surrounded by concrete. The photo below is a close-up of a joist with some termite tunnel damage. In addition, we discovered the masonry load bearing back wall, on which the cantilevered joists rest, needs to be tuckpointed, BIG TIME. This is partially due to a football size wasp nest that had been attached to the wall, for years. We used about 7 cans of Raid Wasp and Hornet Killer to extinguish the population. No joke. You can see bits and pieces of wasps and honeycomb in the photo above. Honestly, I feel a little bad for the wasps, everyone needs a home. But hey, wasps aren't the friendliest of neighbors to have around...

October 16, 2006

King Stud

My friend Larry emailed over today, this handy little diagram, to forward to the framers, since it appears they may have forgotten how to frame a window properly (see yesterday's post)... that, or they must be smoking crack.

October 15, 2006

Let's try this one more time...

It has been one long weekend. Friday morning, the guys started working on the cantilevered bay projection. When we spoke with the contractor, it was our understanding that the ENTIRE bay would be rebuilt. We came home to find the patchwork in the photo above.

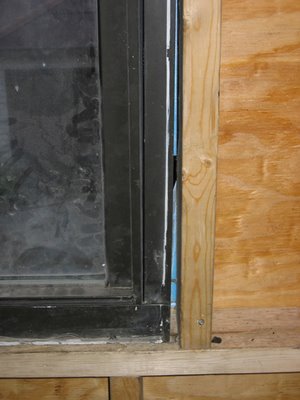
I appreciate that they managed to salvage areas that were not rotted out, but come on... I think they could have produced better carpentry with the areas that were replaced. None of the plywood edges join properly. In addition, as you can see in the photo below, they completely framed the window incorrectly... what happened to the continuity of the 2x4s directly next to the window? They SHOULD frame directly into the floor...
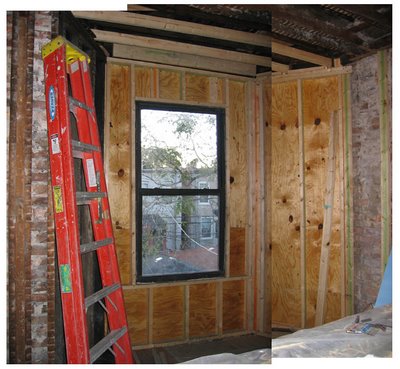
I'm not quite sure how the 2 walls connect... there's no strapping nor any lapping of the 2x6s at the ceiling... I think that shim of a 2x4 may the link... scary.
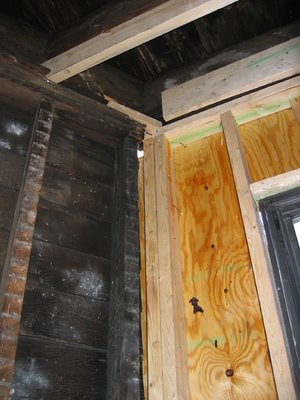
WAY too large of a gap b/w the window and the framing... and I still cannot believe they cut that vertical 2x4.
We met with the contractor this afternoon and said that the work has to be completely redone... he agreed. Basically, he said he wasn't around to supervise the work and it was done in a rush and is totally unacceptable. So, they are starting from scratch tomorrow morning. I hope I hope I hope they get it right this time. I'm sticking around in the morning to supervise.

Oh... and to top it all off, we discovered some wasps made a nest in our wall - in the cavity between the brick and the plaster/lath interior wall. Brilliant. That explains why we've been discovering a handful of wasps in that back room, on the first floor... including a wasp that buzzed itself into my shoe and stung me. Mean bugger.

October 13, 2006

Framing Update

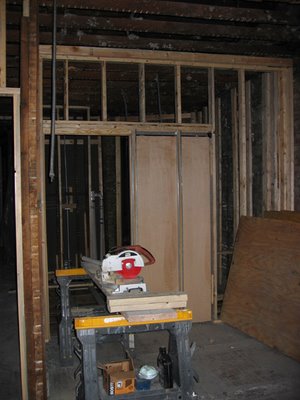
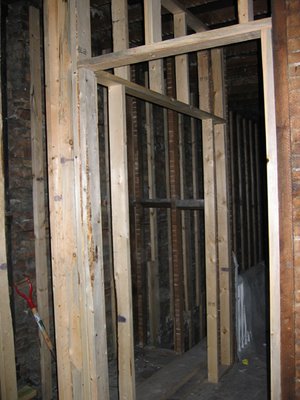
View down corridor, towards front (master) bedroom, facing street. Stair and new hall closet to the right of the corridor, new master bathroom and existing bathroom to the left of the corridor.

Front (Master) Bedroom, facing street - Furring along exterior and party walls.

Front (Master) Bedroom - Pocket door into new bathroom.

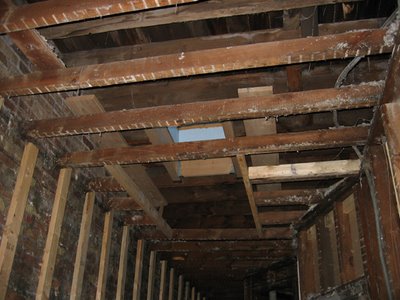
Skylight opening in corridor. In-progress, additional framing still necessary, along with additional framing in order to level the entire corridor ceiling... You can kind of see it in the photo above - there is about 1 1/2" difference in height, using the bottom of the ceiling joist as a measuring point, between the masonry wall and the interior corridor partition wall. It becomes startingly obvious with the skylight opening.
Hall closet and entry into master bedroom (the entry to the bedroom hasn't really changed, we just wanted to try and make the doorway slightly wider, since originally it was only 2'-4").

Now we just need the electrician...

Picked up the recessed can lights at Home Depot last Saturday... they have been sitting in our living room since, awaiting the electrician's arrival Monday. We are using a combination of 4" and 5" Halo recessed can lights, with white baffle trim, throughout the entire upstairs. Originally we were going to get Juno light fixtures thru Lightology. However, after taking a second look at our budget and running a cost and performance comparison with Halo, we opted for Halo, with a cost savings of over $1500. We didn't get the trim option we wanted and Juno fixtures do perform better, but sacrifices must be made and $1500. is mucho dineros.

Our electrician has been really cooperative by allowing us to buy our own light fixtures and switches (combination of Lutron and Leviton). Not only do we get the exact types we specified, we save a large chunk of money in purchasing everything ourselves.