June 14, 2007

NeoCon 2007 Wrap-Up

Yesterday morning, I managed to get over to the Merchandise Mart and check out this year's NeoCon offerings. I'm disappointed to say that nothing really stood out as awe-inspiring, jaw-dropping, wow. However, I did note some highlights:

MOLO - Molo is a design studio, based in Canada, dedicated to materials research and design exploration. They had on display some really interesting pieces made of cardboard (not sure how well it wears though). I fell in love with Float - a line of thermally resistant glassware:
BERNHARDT - Bertoia's barstool still is #1 with me, however Bernhardt's Aro Barstool is very very nice. The seat is ever so slightly concave, allowing for comfortable seating. PLUS, the seat swivels - can't beat that:
MAHARAM - Every time I go into Maharam's showroom, I get this desire to take a textile's course. A favorite - 'Layers', made of overlapping stitched wool, by Hella Jongerius:
VITRA - Yes, that's right... Vitra has opened a showroom in the Merchandise Mart! However, it is very very very tiny. Still, the design of the showroom was rather cool. On display were primarily office systems and seating, plus a few little odds and ends, including the Eames Plywood Elephant:
I'm so excited... I'll be receiving one of the red elephants in December!!! I can't wait! They are so cool.

June 12, 2007

BEFORE we get to the details...

... we need to do some repair work on the the front steps, handrails and porch.

Like the house, the front steps and handrails are made of sandstone. We think we can salvage the handrails (although we will have to do some serious patch work on the bottom inside corner of one). The steps are another story... Ideally, we would replace the steps with new sandstone steps. However, given that we haven't won Lotto yet, sandstone is just not going to happen... the new steps will be concrete. We're still figuring out what to do with the porch and the front walk. Stay tuned...

June 8, 2007

... and now for the details

The drywallers finished up with the final tweaks yesterday. Overall things look pretty good. The doors off the corridor came out nicely (the transom idea was Bryan's... it really does give an illusion of full height doors). So... are we now FINALLY ready to install flooring upstairs? Not quite yet... we still have some messy work upstairs. The master bathroom's plumbing, electrical and framing must be completed and drywall/cement board must be installed. The goal is to get all the really dusty/sloppy stuff done before the nice floor and trim get installed.

Flooring will be a separate post (er, posts). Originally we were going to go with carpet, but I think we're both now leaning towards bamboo. As for trim...

My dad used a beautiful detail for door and window trim, on all the houses he worked on (a lot of commercial office interiors use one variation or other of this detail)... I'll have to upload some photos and some drawings illustrating the way he constructed the trim, however in the meantime, I have attached this Fry Reglet trim piece that is pretty much the same detail:
Usually at door and window openings, trim/moulding overlaps and sits atop the drywall. This detail puts the face of the trim flush with the drywall plane, and leaves a reveal between the trim and the drywall... a separation between different materials (Golden Rule of Architecture: If different materials are constructed to be on the same plane, ALWAYS leave a reveal between the materials... allowing them to breathe... and also because construction is never perfect).
My dad did majority of the construction work himself, so he knew his was framing and drywalling for this detail. However, trying to convey this design intent to the average subcontractor has been challenging. They just don't get it. We gave them dimensioned detailed drawings and a copy of the Fry Reglet cut sheet above. I even showed them photos of my dad's work...

Sub - "So, you want the drywall edges EXPOSED?"
Me - "Yes... finished with a corner bead, mudded and sanded and yes, exposed."
Sub - "But the moulding or trim will be covering up the edge of the drywall..."
Me - "No, there is to be a reveal between the trim and the drywall... they are in the same plane. Like this (me pointing to photos)"
Sub - "Yeah, um lady, someone forgot to fill in that gap or they forgot to put moulding on that door."
Me - "Can you just make sure to dimension the door width to X'-XX" and place corner beads on all drywall edges, please? I'll have you over for coffee once we get the trim put on and you can see it in person..."
Sub - "Okay, you're the boss lady... you architects always get these crazy ideas in your head. No moulding... crazy."

I'm excited to see if we will actually be able to pull off using this detail.

June 5, 2007

In the Manner of Dan Flavin...

Dan Flavin is a favorite - he creates amazing, beautiful works of art from standard fluorescent light fixtures.

Surfing around the internet, I stumbled upon the work of Henry Lau. After installing multiple slim-line fluorescent light fixtures in his apartment, he was left with great lengths of cord dangling everywhere.

He wrapped and secured the cord with U-hooks, on the walls, in a vine-like pattern.
I prefer no-cord, but if concealing the cords is not an option, this solution is brilliant.

June 4, 2007

Primed

The drywall still needs a few touch-ups here and there, but overall, it has been mudded, sanded and primed. We ended up going with Sherwin-Williams 'Harmony' Interior Primer. It is Low VOC, so it has no odor and also is non-toxic, which is nice, considering we are living in the house while it off-gases.
Back Bedroom

Corridor

Middle Bedroom

Master Bedroom

Design Out of Reach

I have always had a love for Airstreams. They are classic. Their design, timeless, and their concept... "light enough to be towed by a standard automobile... every inch, a functional purpose".

If Chicago had a milder climate AND we had a bigger yard AND I had some extra cash burning a hole in my pocket... I would buy one in an instant. I'd park it out back and use it as a studio space/guest house. Then, if a road trip beckoned... just pack it up and hit the highway.

Well, today I read that Design Within Reach has teamed up with Airstream to create a special edition trailer, outfitted with Tripolina Chairs, Heller Dinnerware, a Nelson Ball Clock and even a Maharam Pillow... price = $49,066. Once again, Design Within Reach has put a favorite OUT of reach.

Well, to be fair, I guess it was never really in reach anyway...

June 1, 2007

Corona Solar Light

... no, unfortunately, it's not a new version of Corona Light beer that has been scientifically formulated to stay ice cold outdoors, by using the solar panels on the label to keep the bottle refrigerated (although if anyone from Corona happens to be reading this blog, I'm your new Director of Creative Marketing). No, no, seriously now... the Corona Solar Light uses solar panels to charge during the day, and once the sun goes down, the light can either be placed in the ground, using the included stakes, or detached and placed on a table top, like a portable candle. Bad news is currently it is only a conceptual product, awaiting connection with a manufacturer or distributor. Until then, Luce Plan has some light fixture options... no beer though.

Muji!

Muji is coming to the States! New York, not Chicago though... what's up with that?

Marc Newson

A few months ago, I read about an exhibit of Marc Newson's work, at the Gagosian Gallery in New York. I ended up purchasing the exhibit catalog, seduced by the marble bookcase and chair in the photo above. Each work in the exhibit is fashioned as a single, seamless piece. Beautiful.

Hooray for Wool

I am currently drooling over Ruckstuhl wool carpet...
the details are brilliant:
Until I can save up enough pennies for a Ruckstuhl purchase, I am very much enjoying my softbowl, by MIO. It's a great storage container PLUS it's eco-friendly. Made of 100% molded wool, a rapidly renewable material, the production of the bowls uses one tenth the energy needed to produce a ceramic version.

May 31, 2007

Almost Ready for the Primer...

Corridor - Looking towards Back Bedroom (facing alley)

Middle Bedroom

Roof Hatch

Back Bedroom (facing alley)

May 28, 2007

The Drywall is Up!


May 15, 2007

May 14, 2007

Spring Has Arrived...


Leveling the Floors

The drywallers started today! They are actually doing a little more than just drywall... Our existing subfloor was in bad shape, so they are patching, leveling and replacing areas of the subfloor prior to installing the drywall.
In order to level the floors, the carpenter is 'shimming' at the floor joists. In the middle bedroom, he actually removed the entire existing subfloor, since it was in such bad shape. However, in the corridor, he is just placing shim strips, every 16" on center, on top of the existing subfloor - you can see the strips at the bottom half of the photo above. On top of these strips, he will then secure 1/2" plywood sheets, which will be the new subfloor.

The New Roof Hatch

The roofer came last Thursday and installed (FINALLY) the new roof hatch. At 30" x 36", it's a little larger than the previous hatch PLUS it has a skylight. The upstairs corridor used to be so dark - now, with two skylights, I almost need sunglasses up there! It's amazing. Now we just need to finish framing the ceiling joists...

Hoo


Bryan woke me up one morning, about two weeks ago, to tell me that there was an owl perched in the tree, in our front yard. When I went outside to take its photo, it did its little exorcist rotating head turn to watch. my. every. move. Slowly, I approached the tree, fearing with every step, I would provoke the owl to spread its wings and lunge at me, with claws outstretched. I think the owl must have been exhausted from a night of serious hunting since it didn't move (apart from the rotating head)... it didn't even flinch when Charlevoix emerged from the house. It. just. watched. her. very. intensely. Thank god Charlevoix didn't see it - she would have gone all Kujo. Turns out it was a long-eared owl, which used to be on the Illinois endangered species list, but I guess they are making a come-back.
Bryan got home from work earlier than I did that evening. He said when he got home, the owl was STILL in the tree, however after sunset, it flew off to the neighbor's tree and after a short rest, flew away.
The owl returned to the neighbor's tree today, but not ours. I think it didn't appreciate our paparrazzi photography while it was trying to sleep...

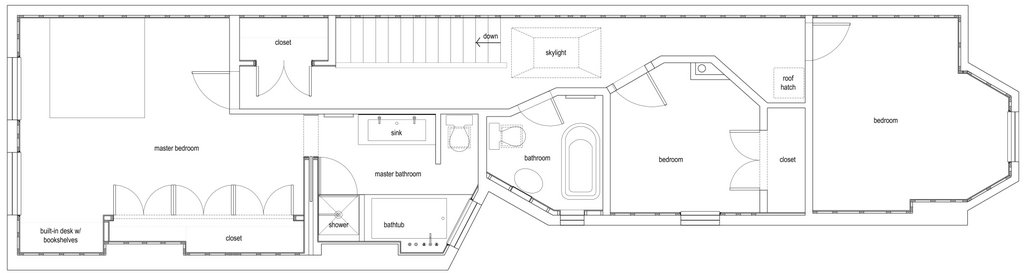
THE Second Floor Plan

After much tweaking and deliberation, we think we've figured out the second floor. To be honest, the drywaller started today, so we had to call it quits on massaging majority of the design...

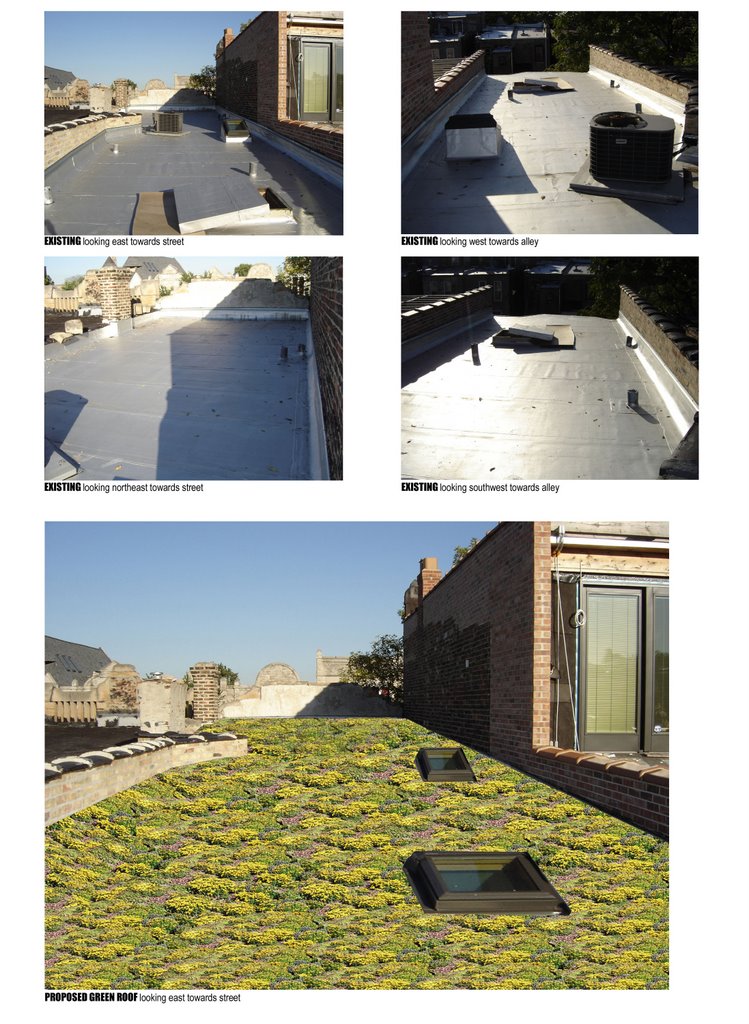
We still have a few outstanding items not shown in the plan above: Shelving/Desk between the two closets in the Master Bedroom - we're looking at a system from Atlas Industries; the ship's ladder, at the roof hatch, for means of accessing our future Green Roof; the stairs (treads and risers need to be rebuilt), guardrail and handrail; finished flooring (we think we'll go with carpet, it's cheaper, but wood floors would be sooooo nice...); AND the Master Bathroom.

April 17, 2007

New Appliances... and Parquet?

Sunday, while Bryan was framing out the roof hatch opening upstairs, I installed temporary quick-fix flooring in the kitchen, courtesy of the Home Depot - vinyl, self-stick, faux-wood parquet floor tiles. DON'T LAUGH... the tiles were cheap ($60 total) and a means of fast installation... Just pretend it's real wood parquet... squint at the photos...

The existing kitchen floor tiles were just TRASHED. Broken, stained with adhesive, scuffed and brittle, they would not last another 3 months, and there is no way we'll get to rehabbing the kitchen by then, alas, the temporary quick-fix flooring. Plus, the new appliances just demanded vinyl fake wood parquet floors:

Okay, the appliances actually demand A BRAND NEW KITCHEN, but the vinyl parquet will just have to do.

I ran out of steam around 10pm and did not finish the area around and under the refrigerator. In case you were wondering, the new refrigerator is too big to fit into the old refrigerator's niche, and if we (Bryan) want to keep the water and ice dispenser hooked up (the man needs his ice, what can I say?), we have to keep the refrigerator in front of the counter. It's not that bad... at least we don't have to keep it in the living room, next to the bed, although that could be convenient...

Charlevoix to the Rescue


April 11, 2007

Find the New Appliances...

My life is like a Cracker Jack Box... every day a surprise, when I open the door!

January 15, 2007

FOUND: Service Stair

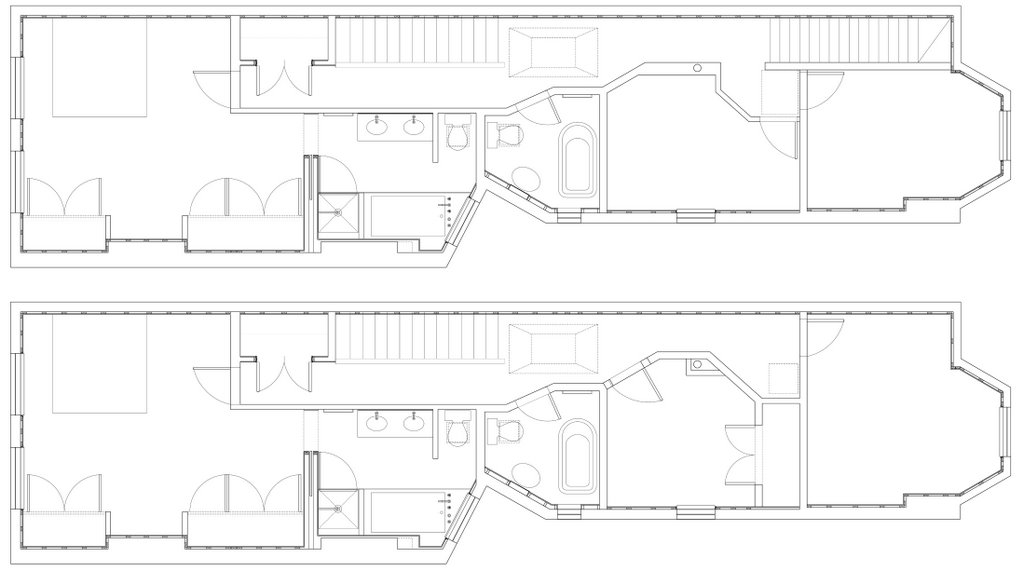
Yesterday, while taking something down to the basement, I began inspecting the very sad state of our basement stairwell. I thought it odd that the stairwell's ceiling sloped, until it dawned on me... our neighbor's house has a rear / 2nd stairway to the second floor... we probably do too, except ours has been covered up by a wall on the first floor and floor on the second!
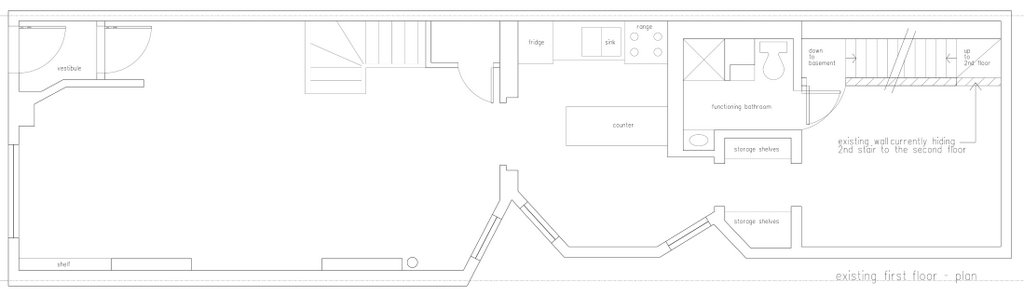
I quickly sketched up a revised second floor plan, illustrating modifications to our current plan if we were to go ahead and resurrect the hidden stair. The bottom plan shows existing, while the top plan includes the 2nd stair. We decided to just leave the hidden stair hidden. Too much space is lost on the second floor to justify the cost of restoring the stair... even though it really is a fantastic vintage original feature (sigh).

January 12, 2007

Flashback... Winter 2006

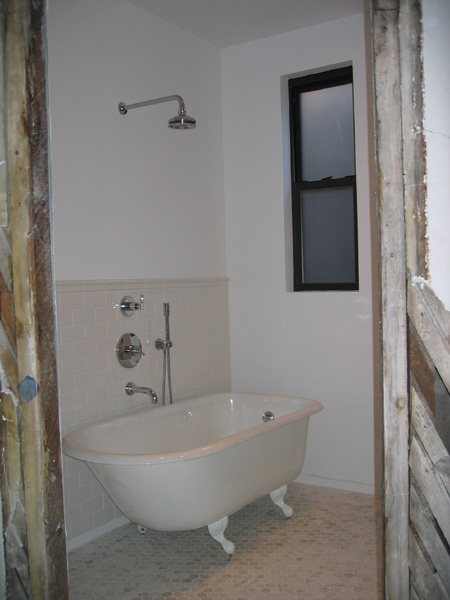
Exactly one year ago, we began major interior construction efforts on the house with the total gut rehab of the existing second floor bathroom, which, in truth, did not really exist, apart from a very sad little tub and cracked lead pipes peeking thru a crumbling tile floor. We decided to work with what we could salvage, which turned out to be wall studs and a window...
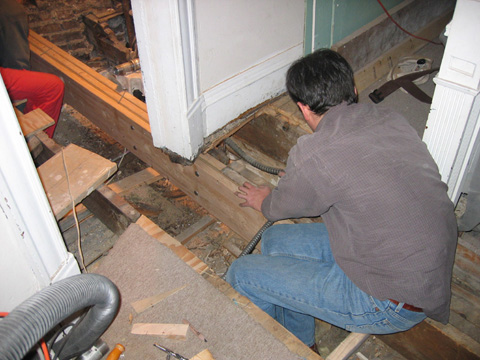
All the floor joists needed to be reinforced, due to water damage. One needed to be partially replaced, due to extensive water damage... and of course, the stairs framed into THIS particular joist. Alas, began the Great Joist Project of 2006.

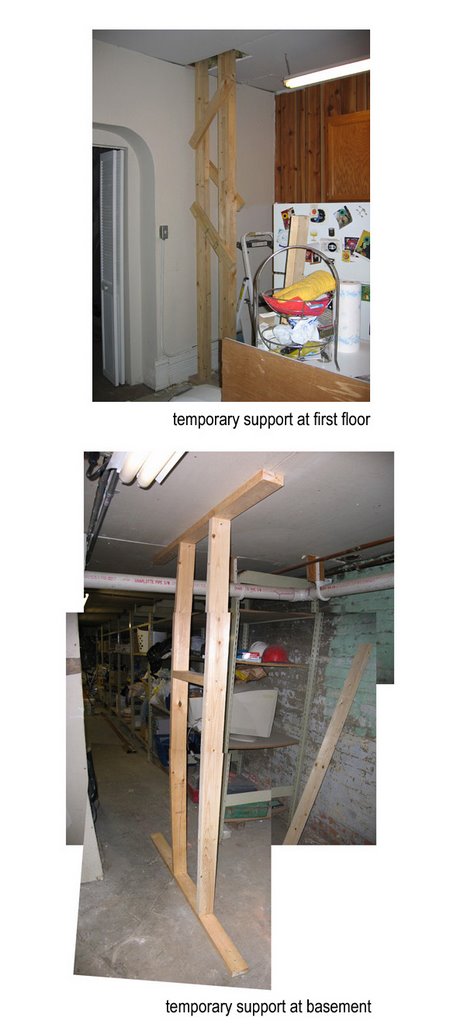
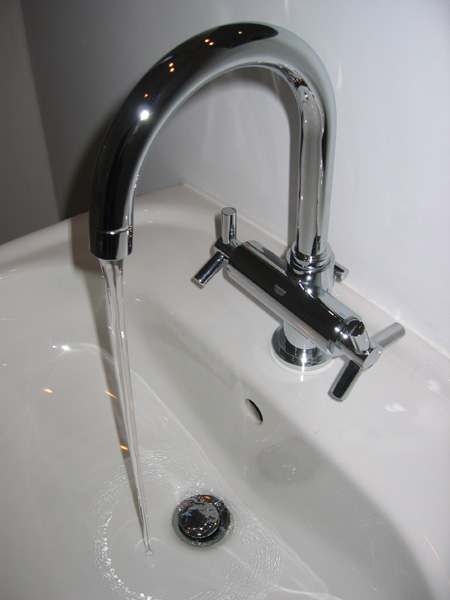
Temporary column supports were constructed on the first floor and in the basement, so that the second floor would not fall onto our first floor. The best part was removing these... Just in case the connection between the new joist and the old failed, we decided to remove the temporary column supports in increments, so that the columns could still serve as an emergency crutch. I sat in the upstairs corridor, watching the joist connection, while Bryan cut away at the bottom on the column on the first floor, inch by inch... if I saw any indication of failure, I was to yell, and how. Good news is the connection did not fail... there was settlement though, which was pretty darn interesting to see... The infamous rotted joist... I don't think it was supporting ANYTHING, which means with our new joist, I think structurally, we should be a-okay.Due to the very odd shape of the room, we decided to go with octagonal 1" marble floor tile. We found a great deal at Tile Outlet (on Fullerton Ave., just west of the Kennedy Expressway). Only $6. per square foot! The only problem was that the tile came in 12" square foot sheets and the mesh backing of these sheets caused a sticky gluey nightmare when cutting the tile. In addition, the stone is not the best quality... but it's as close to Carrera or Thassos Marble as I think we'll be able to get! Ceramic wall tile came from Daltile... with industry discout we paid approx. $1.25 per square foot. THAT was a GREAT deal! When we started this project, we weren't sure if we would be adding a second bathroom upstairs, so we decided to install a nice big soaking bathtub, with shower. The double ended clawfoot tub was our first choice, but in cutting costs, we went with a slightly smaller single ended clawfoot tub instead, purchased thru Signature Hardware. Bathtub, shower and sink faucets came thru Grohe (a bit of a splurge, but they are BEAUTIFUL... they feel so solid yet operate so smoothly... like silk). The pedestal sink came from Vitra Bathrooms and amazingly, was the cheapest purchase of the project, at approx. $130.
The toilet is a Kohler Cimarron, low-flow, therefore eco-friendly, purchased thru Home Depot. The medicine cabinet came thru Basco, Inc (not the best quality, but about 1/2 the price of Robern). Light fixtures are Halo, 4" recessed can lights, courtesy of the Home Depot and the radiant floor heating was purchased thru Warmly Yours. There are some items we still have yet to install... a shower curtain rod, some storage and shelving, towel hooks or rails, toilet paper holder (crucial, I know...). We also were debating on adding some extra tile on the walls... and, finally, when we paint the rest of the upstairs, this room will be included. Oh... almost forgot, some blinds, for the window... right now it sticks out like a stubbed toe. Oh well... new window was not in the budget.

January 11, 2007

Green Roof Grant Granted

Last October, we decided to submit an application for a City Of Chicago Green Roof Grant. The program, established in 2005, awards selected residential and small commercial projects (less than 10,000 square feet) up to $5,000. each, to assist with the construction of a green roof. Excerpts from our application:
Application was submitted and forgotten... until a letter arrived in mid-December, notifying us that we were selected as one of the recipients. We should be receiving the official 'Green Roof Grant' package sometime later this month. Stay tuned...